Discussions Regarding the Preschool Observation Checklist and Evaluation Tool (POCET)

Tuesday, December 11, 2012

We've Moved!!!!

We’ve moved! Discussions Regarding the Preschool Observations Checklist and Evaluation Tool (POCET) is now hosted on Wordpress at Discussions Regarding POCET™. Please change your bookmarks so you can keep up with the latest news and discussions!

Monday, November 26, 2012

Activity Idea: Parachute Tricks

Toddler QuickSource® rminds us that the toddler years are a prime age for building connections within the brain. Language, cognitive skills, social emotional development and physical development are the four areas of focus for toddlers. "Social and emotional development is critical during the toddler years because 18 to 36 months is a prime age for building social connections within the brain. During the toddler developmental stage, children will more fully understand emotions and begin to adjust behaviors to meet the surroundings and social situation. A toddler also becomes very aware of the 'special' responsibility and connection she feels with family members."

Here's an activity called Parachute Tricks that will help children develop gross motor skills and will provide opportunities for children to work together and problem-solve. For this activity, you will need a 6' Brawny Tough Rainbow Parachute, a set of Colored Beanbags, and a set of Foam Balls.


6' Brawny Tough Rainbow Parachute (P6)
Colored Beanbags - set of 12 (CBB)
Foam Balls - set of 6 (FOAMBS)

Let's Get Started:1. A small parachute is a great prop to use with children around the time they reach 3 years old.

2. Have each toddler grasp one of the handles on the small parachute.

3. Tell the children to shake the parachute, raise and lower the parachute.

4. Place beanbags or foam balls on the parachute and let the children discover what happens when they shake the parachute.

5. Point out to the children what happens when they work well together.

If using POCET™, this activity correlates to Developmental Guideline: EE17: Begins to Function in Group Settings with Cooperation.

Labels: , , , , , , , ,

Wednesday, November 07, 2012

Activity Idea: My (Almost) Everything!

Preschool Activity QuickSource® reminds us that Social/Emotional activities help children become "caring, competent, and confident individuals. You can nurture children's social emotional development by giving them a strong sense of self, fostering their independence, encouraging them to make friends, and teaching them to share."

Here's an activity called My (Almost) Everything! that will help children to recognize their personal information and remember it. For this activity, you will need Colorations® Simply Washable Tempera (WST), White Sulphite Paper (12SU), Colorations® Permanent Markers (PERMBLK), and 9"White Paper Plates (DIXIE).


Materials Needed:
Colorations® Simply Washable Tempera (WST)
White Sulphite Paper (12SU)
Colorations® Permanent Markers (PERMBLK)
9"White Paper Plates (DIXIE)

Let's Get Started:
1. Squirt different colors of paint onto white paper plates. Have each child make handprints on their paper, with lots of room at the top for text. Allow to dry.

2. Have a list of 10 questions, one for each finger.
My name is.....
I live at/in.....
My favorite color is.....
My favorite food is.....
My favorite animal is....
When I grow up, I want to be a....
I like to.....
I wish to....
If I could have a super power, it would be.....

3. List their answers, one above each finger, with the marker.

4. Write each child's name on their paper and display around the room.

If using POCET™, this activity correlates to Developmental Guideline: SE1 Shows Awareness of Self and Knows Personal Information.

Labels: , , , , , ,

Wednesday, October 24, 2012

Activity Idea: Colorful Nature Collages

HeadStart QuickSource® reminds us that Creative Arts Expression engages children's minds bodies and senses by allowing for creative and imaginative expression in music, art, creative movement, and drama. "The arts invite children to listen, observe, discuss, move, solve problems, and imagine using multiple modes of thought and self-expression. The creative arts provide ways for young children to learn and use skills in other domains. In the domain of Creative Arts Expression, programs need to ensure that children who are dual language learners can demonstrate their abilities, skills, and knowledge in any language, including their home language."

Here's an activity called Colorful Nature Collages that gives children the opportunity to express their creativity and explore color with materials from nature. For this activity, you will need natural materials such as leaves, berries, tree bark, grass, and seashells. You'll also need poster board, constuction paper or No Glue Collage Boards, glue, paper bags, and markers.

Materials Needed:
Fall Fabric Leaves - 200 pieces (LEAFY)
Wood Craft Rounds - 50 pieces (WOOD50)
Medium Sea Shells - 1 pound (MDSS)
No Glue Collage Boards - set of 24 (NOGLUE)
Economy Weight White Poster Board - 50 sheets (EWB)
12x18" Colorations® Heavyweight White Construction Paper - 50 sheets (12W)
Colorations® Washable School Glue - 1.25 oz bottle (SCWG)
White Paper Craft Bags - set of 100 (WHBAG)
Colorations® Super Washable Chubby Markers - set of 256 (256CHB)

Write the name of a color with a matching marker on each of the paper bags. Select colors that children will find in nature – brown, green, red, gray, black, etc.

Invite each child to select a paper bag. Explain to the children that they will go on a nature walk to find materials in nature that are the same color as marked on their bag. Encourage the children to collect leaves, twigs, rocks, berries, tree bark, etc. and put the materials in their bag.


Let's Get Started:
1. After the children return to the classroom, invite them to share some of the materials they found on their hike with the other children.

2. Give each child a piece of construction paper or poster board and glue. Or, you can use collage boards.

3. Invite the children to create a colorful nature collage using the materials they found on the hike.

4. Once the children have finished gluing their materials to their poster board, construction paper or collage board, allow the collage to dry and hang in the classroom.

5. Be sure to label the collage as Sarah's Red Collage, Jimmy's Green Collage, etc.

Furthermore....
Most likely the children will have extra collage materials. Put all of the leftover materials in a pile and encourage the children to make another collage. Invite the children to create a collage of similar textures, shapes, or sizes.

If using POCET™, this activity corresponds with the devlopmental guidelines shown in CA5: Explores Drawing, Painting and Modeling with Different Materials and Media.

Labels: , , ,

Wednesday, October 10, 2012

Activity Idea: Recycled Super Snake

Environmental QuickSource®  reminds us that "Children will re-discover the gifts of nature as they become a source of classroom fun, and they’ll learn that taking small steps today will provide for a healthier environment tomorrow."

A fun, Eco-friendly activity to reinforce what children have learned about snakes and to build team-work. For this activity, you will need Colorations® Washable School Glue (SCWG), 
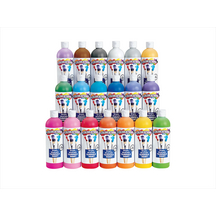
Colorations® Simply Washable Tempera Paint (WST), Fiskars® 5" Preschool Scissors (FSKPS), Colorations® Plastic Handle Jumbo Chubby Paint Brushes (BTPB), 
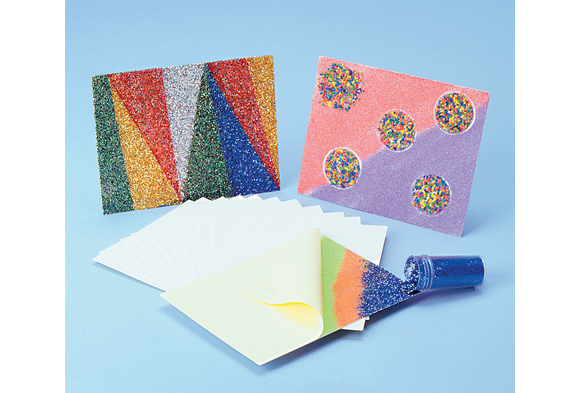
Black Self-Adhesive Wiggly Eyes (100BA), a One Hole Punch (OHP)Tipped Lacing Yarn (YARNTIP) and Pipe Cleaners (PPIPE).


 Materials Needed:
Assorted Colors Pipe Cleaners (PPIPE)
Colorations® Simply Washable Tempera Paint (WST)
Colorations® Plastic Handle Jumbo Chubby Paint Brushes (BTPB)
Colorations® Washable School Glue (SCWG)
Fiskars® 5" Preschool Scissors (FSKPS)
Black Self-Adhesive Wiggly Eyes (100BA)
One Hole Punch (OHP)
Tipped Lacing Yarn (YARNTIP)

 Let's Get Started:
 1. Review unit on snakes. Point out key facts about snakes such as how they eat, how they move, and especially what kind of skin they have, etc. Let children look through books or pictures of different kinds of snakes and point out differences and similarities between the scale patterns and colors.

2. Cut the collected paper towel rolls into 2” pieces.

3. Cut the collected newspaper into 2” wide strips and long enough to wrap around the tube.

4. Have the children wrap the newspaper strips around the tubes and glue into place.

5. Have the children paint over the strips in different colors, allowing some of the newsprint to show through the paint, giving it the illusion of “scales.” These are the snake “sections.”

6. Punch holes with the hole punch in each side of the tube, two holes at each end, across from each other.

7. Have the children tie the painted sections together by using string laced through the punched holes (or twist pipe cleaners if the children are not able to make knots). The snake can be as long or as short as the children want. Let them decide if they want to alternate certain colors, or make any other patterns with the colored sections.

8. When the snakes are complete, have the children decide which end is the head and stick a pair of wiggly eyes (or draw the eyes with marker) on the head. Slightly flatten the tail end so it comes to a point.

 Furthermore....
Let the children move the snake in different ways that snakes move - slithering, inching, gliding, jumping, etc. The snake is great for hanging around the classroom as decoration or for using as a measurement tool.

 If using POCET™,  this activity correlates to Developmental Guideline: CA6: Plans and Works Independently through the Process of Art Activities.

Labels: , , , , , , ,

Wednesday, September 26, 2012

Activity Idea: Where Did the Ice Go?

Preschool QuickSource® reminds us that science is the "study of the world and how it works. Children are natural scientists and their curiosity leads them to seek answers to questions and make connections. By experimenting, making predictions, exploring, testing observations, and investigating, children learn about the world they live in. " Children can discover many things about the world they live in simply by asking a few questions and observing their environment.

Here's an activity called Where Did the Ice Go? that will help children learn to collect, describe and record information. For this activity, you will need white sulfite paper, sand and water activity tubs, and Colorations® large crayons.

Materials Needed:
12x18" White Sulfite Paper, 500 sheets (12SU)
Sand and Water Activity Tubs, set of 4 (TUBS)
Colorations® Large Crayons, set of 8 (CRL8)


Let's Get Started:
1. Place ice in the water table or tub.

2. Give the children an opportunity to play and explore in the ice with different tools.
3. Ask the children to observe what is happening to the ice as they are playing.
4. Draw attention to the water when the ice is completely melted.
5. Give each child a small journal book or a large paper folded into fourths.
6. Have the children record what happened to the ice by drawing pictures. The first picture should be of the frozen ice with the final picture being the melted water. Observe what the children do in the pictures between the ice and the water.

Furthermore....
Extend this activity by freezing other liquids, such as Colorations® Liquid Watercolor™ or various kinds of fruit juice. Ask the children to determine which melts faster or slower.

If using POCET™, this activity corresponds with the devlopmental guidelines shown in SC 2 Collects, Describes and Records Information.

Labels: , , ,

Wednesday, August 29, 2012

Activity Idea: Word of the Week

Kindergarten QuickSource® reminds us  that "Children in the kindergarten years will strengthen emerging literacy, numeracy skills and their speaking and listening skills while acquiring new words as they share their discoveries with others."


Here's an activity called Word of the Week  that will help children increase their vocabulary. This activity gives the child a solid foundation to begin the reading process during this first year of school. For this activity, you will need White Sentence Strips - Pack of 100  (WSE)Pocket Chart (POCK),  and Markers  (PERMCLR).


 Materials Needed:
White Sentence Strips - Pack of 100  (WSE)  
Colorations® Color Permanent Markers - Set of 12 ( PERMCLR)
 Pocket Chart (POCK)

Let’s Get Started:
1. A good way to increase vocabulary in young children is to choose a "Word of the Week." A word should be chosen that may be unfamiliar to many of the children.
2. Write the word on a card or sentence strip while the children watch.
3. Have the children say the word.
4. Post the word in a place where it can be noticed often during the week.
5. Throughout the next few days, revisit the word asking the children the meaning.

 If using POCET™, this activity correlates to Developmental Guideline LG3: Understands More Complex Vocabulary and Displays Listening Comprehension.

Labels: , , ,

Wednesday, August 15, 2012

Activity Idea: Finger Writing

Preschool Activity QuickSource® reminds us that " Finger writing is a good way to help children develop fine motor skills and begin to understand the formation of alphabet letters."

Here's an activity called Finger Writing that will help children develop their sorting and grouping skills. To progress from using scribbles to using letter-like symbols. For this activity, you will need colored sand (CS), art tray (RECTRAY) (or cookie sheet and sand) and colored tape (CMT).

Materials Needed:  
 Colorations® Colorful Craft Sand  (CS)
 Colored Masking Tape (CMT) 
 Brawny Tough Large Plastic Art Trays ( RECTRAY)

Let's Get Started:
1. Place a piece of colored tape on the left side of a cookie sheet.

2. Spread a thin layer of sand or salt on a cookie sheet.

3. Have the child practice writing his or her name with their finger in the sand beginning at the tape and moving left to right.

4. Show the child how to quickly “erase” errors or to begin again by smoothing the sand with his or her hand or by gently shaking the tray to reposition the sand.

A variation of the activity is to place colored hair gel in a small zip locked plastic bag, seal it, and watch what happens when the child’s finger writes while the bag is lying flat on a table.

If using POCET, this Activity correlates to Developmental Guideline: LT 15 Progresses from Using Scribbles to Using Letter-Like Symbols.

Labels: , , , , , , , ,

Wednesday, July 18, 2012

Activity Idea: Sorting Seashells

Head Start QuickSource® reminds us that Mathematics Knowledge & Skills refers to the "conceptual understanding of numbers, their relationships, combinations, and operations." During the early years, math skills help children to connect ideas and develop logical and abstract thinking.

Here's an activity called Sorting Seashells that will help children develop their sorting and grouping skills. For this activity, you will need Sea Shells (PSMSS), Colored Masking Tape (CMT), and Brawny Tough Plastic Art Trays (ARTRAY).
Materials Needed:
Sea Shells (PSMSS)
Colored Masking Tape (CMT)
Brawny Tough Plastic Art Trays (ARTRAY)

Let's Get Started:
1. Make a sorting tray by dividing a tray into sections with the colored tape. Create as many sections as you have different types of seashells.

2. Have the children sort the seashells by similar characteristics such as size or shape. Place the groups into the tray.

3. Try sorting the shells by two attributes, e.g., small white shells or large brown shells.

4. Ask the children how many shells are in each group.

Furthermore....
Repeat the activity again, this time using shells from biggest to smallest or by texture - smooth shells and bumpy shells.

If using POCET™,  this activity correlates to Developmental Guideline: MA3 Classify and Sort by Attributes.

Labels: , , , , , ,